I have an iPhone. I have an Instagram account. I don’t have a lot of knowledge about using my iPhone to take amazing photographs, other than the basic techniques. Or rather, I didn’t, because I recently attended an iPhoneography Workshop with Instagram queen, Sara Tasker.
Organised by Shutter Hub as part of their OPEN 2016, Sara – of Me & Orla – travelled down from Yorkshire to NOVI in Cambridge to teach us some of the tricks that would help us to take better photos using just our smartphones.
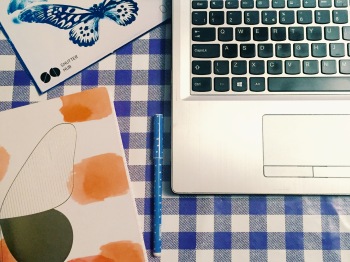
The photos that I took on the day have not been altered/post-produced since the event. They’re either just as I took them, or edited with VSCO during the workshop (more on this below). I’ve included a few additional images from my photo library and screenshots to help demonstrate some of the points. 🙂
a bit about sara
Sara has a little girl, Orla, who is the same age as our little Ben: three years old. When due with Orla in 2013, Sara set herself an Instagram challenge: to post one photo every day. Her Instagram following flew from 90 to 37k in just a few months. It stands at an eye-watering 129k in July 2016.
iPhone photography has changed her life. Heavily in demand as a writer and photographer, Sara has huge companies (inc. Samsung, Canon & Land Rover) falling over themselves to have her leading their photographic campaigns.
You can see why I was so excited to be at her workshop, can’t you! 🙂 And, yes, that is Sara with Luke Skywalker (a.k.a. Mark Hamill 🙂 ). Be still my beating heart!
back to basics
Sara began with a run through of the basic techniques of using the native iPhone camera app. You can never assume that it’s old news for everybody.
It’s worth noting that, while the instructions in this post are written for the iPhone, the majority of functions are relevant for all types of smartphone.
- Swipe your finger up from the bottom of your iPhone and you’ll see the camera icon. This can also be done when the phone is locked.
- Tap the screen to manually focus on your subject.
- Set the exposure once you’ve set the focus by moving your finger on the screen: upwards to increase exposure, and downwards to decrease exposure. (Usually better to slightly underexpose, as this is easier to fix in post-production.)
- Lock focus & exposure by holding finger on the screen for a few seconds. ‘AE/AF LOCK‘ will appear in a yellow box. (Set exposure instructions (above) apply here too.)
- Burst mode will take up to 10 frames per second in full resolution; hold down the shutter release button to activate burst. (To delete those you don’t want, open the photo album and click select to see them all, tap to select then delete).
- HDR (High Dynamic Range) is essentially exposure bracketing. It’ll take one photo too light, one too dark, one in between, and then merge them together.
- Use the camera grid to help you with ‘rule of thirds’ (more later) and to get your horizontal and vertical lines just right. To find it, go into Settings -> Photos & Camera and swipe Grid to the right.
- For alternative shutter release buttons you can use your iPhone’s side volume controls, headphones with built-in volume controls or a bluetooth remote control.
task 1: photograph SOMETHING INTERESTING
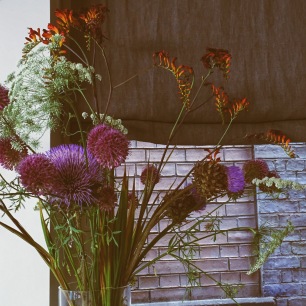
Sara set us our first task which was to find something that took our eye within or outside our venue, NOVI. I panicked a bit as the downstairs bar had people in it. People who didn’t know the brief and were possibly wondering if I was just trying to find the loo. (Mind you, nobody offered any help!)
So, just a few warm up photos. (Got a bit more confident later 😉 )
composition
Next part of Sara’s talk was all about composition. There are a few main principles of composition in photography, whatever form your camera takes. So the following points are useful for all photographers.
As composition is the one thing you cannot fix in post-production, try to get it right.
- Rule of thirds: Camera grid should be on for this. Put your subject/points of interest on one or more of the horizontal and/or vertical lines.
- Angle: Top-down shows the viewer what you’re seeing at that moment (feet, coffee cup, book on your lap, etc.). Or why not climb to get an even higher angle, or crawl/lie down to get the perspective of a small child or animal.
- Straight lines: Where there are supposed to be straight lines, use the grid to help get the horizontal/vertical lines just right.
- Balance: Think about the tension between colours, objects, moods, etc.
- Negative space: Essentially the empty space around & between objects (main subjects) in your photo. It’s a simple way to make your subjects pop out, helping the viewer to see exactly what is important in your photo.
- Repetition & patterns: They can be natural or manmade, close up or with space around. Once you get your eye in, you can see repeating patterns everywhere. Try it!
- Texture: Consider all the senses and make your images feel relatable to the viewer. Life isn’t ordered and tidy, so randomness in photos feels real (even when staged!).
- See what I see: Capture a moment in time from your perspective. Perhaps a styled table or a pretty street scene. An ‘aspirational moment’ is a very popular style on social media.
Task 2: top-down
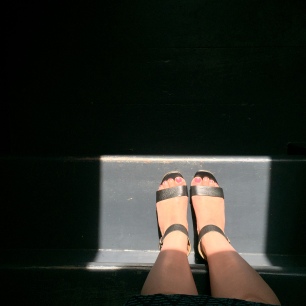
Our next task was to take a top-down photo including either our hands or feet.
I felt a bit better on this task as we’d all warmed up a bit and chatted together about what would work. Taking photos of my feet in random places, with the general public as an audience, suddenly felt perfectly normal!
self-portrait
Taking a self-portrait puts you in the story and it can be an enormous confidence booster to have a beautiful photo of yourself saved on your phone. Even if nobody else sees it. And, it needn’t be your full face; it could be part of it, or the back of you, so long as you’re there.
We’re not talking classic selfies here; Sara is not at all keen on using the front-facing camera held at arm’s length. That results in a poorer quality image (which might be seen as a good thing?!) but I absolutely see the value in taking it with the superior camera at the back of your phone. I’m a convert.
The iPhone 6, and above, has a self-timer with burst mode. You can choose a timer of three or 10 seconds and it will capture 10 images. There are third-party apps for self-timers which offer extra options.
task 3: self-portrait with timer
You know what’s coming. Collective ‘oh my gawd’ when Sara announced this one!
My self-portrait is taken from a windowsill, my iPhone propped up and held in place by a pile of flyers. I had no real idea where it was pointing when I pressed the button. I had 10 seconds to find an angle where I thought I’d be in shot. I had two attempts at this, and the photo below was the one I took first.
All things considered, I think it came out okay composition-wise, but I could’ve done without the shiny face! 😉
post-production/Post-processing
No, it’s definitely not cheating to edit your iPhone photos! Every photographer does this, whether shooting on smartphone or DSLR. No need for snobbery. 😉
The app that Sara recommends, and uses, is VSCO. It’s available free of charge from iTunes. Lots of functionality with the free version, but you can purchase additional filters; decide whether it’s for you before you commit money. During the workshop we used VSCO to edit our photos for task 4, below. Easy to use, and there are lots of tutorials available online.
Others apps worth a look are Retouch (to remove flaws), Lenslight (to add light effects), Flixel (for cinemagraphs) and iMovie (for video).
Task 4: edit today’s photos
It took a while to download VSCO as we were all simultaneously fighting for the Wi-Fi, but I had time for a quick look around the features and edit the two photos below. My aim was the ‘vintage look’ and I think they were on the way there, but need a bit more work.
And, quick as that, our workshop was over. I can’t tell you how useful it was for me. I always learn best when doing, rather than just listening; the practical, hands-on format of the workshop helped to give me a much better understanding of just what my little smartphone is capable of.
Every day since, I’ve taken photos using what I’ve learnt; I think my photos have improved already. Maybe you’ll be able to notice for yourself on my Instagram feed! 🙂
Sara was so easy to listen to, funny, down to earth and genuinely wanted to help. Plus, did I mention that she’s met Luke Skywalker. True girl crush. 😉
If you’re hanging in there (well done!), I’ll add a few extra tips to finish off . . .
tip 1: consistency
If you’re looking to create a personal style or brand, you should strive to keep things consistent. This includes elements like the white balance and filters, and whether you prefer a vintage or contemporary look.
TIP 2: INSTAGRAM FILTERS
Filters on Instagram are hugely popular and are great for speed & simplicity. However, if you have the time to edit your photos, it is worth using a third-party app as they exist to produce the best filters & features for your photos and are regularly updated and improved, whereas the range of Instagram filters tends to stay pretty static.
tip 3: Screen brightness
When you’re editing your photos on your iPhone make sure the screen brightness is up to maximum. It’ll make a huge difference, but it’s easily overlooked.
TIP 4: Multi-select photos to delete or copy
You’ll love this one. So, you want to delete a batch of dodgy photos, or select and copy a group of photos to a different album. No need to sit there tap-tapping every single photo (we’ve all done it): you can select them en-masse using one finger.
Open your album and click ‘Select’. Touch really lightly on the first image you want to select, (don’t hold it down) slide your finger gently across to the far right side, then down as far as the last photo you want to select. Photos are ticked as you go. It’s super quick! If you don’t have a smile on your face the first time you do this, I’ll be surprised!
tip 5: Keep your photos – yes, even the bad ones
If (like me) you take several photos of the same thing before sharing/copying/printing the best one (usually the first, am I right?) then take a good look at each before deleting.
What didn’t you like about it? Why didn’t it work? Was it the angle, composition, error in post-production (poor filter, etc.)?
Don’t delete them all; keep some back (in a separate folder, perhaps) so you can learn from your mistakes, and also so that you can look back at how your style has evolved.
scratching the surface
Hopefully some of these techniques & tips are new to you and will help you to create some memorable photos that will make you smile the broadest smile.
Sharing is caring and Sara has tonnes of helpful posts on iPhoneography and Instagram on her website. Tell her I sent you. 🙂 She will be running e-courses in due course (stay tuned); my post is very much only the tip of the iPhoneography iceberg.
Finally, if you’d like to find out more about the Shutter Hub OPEN 2016, take a look at their website and you can search #SHopen2016 on social media.
Do you have any further tips for perfect iPhone photos? Are you on Instagram? If so, come find me! I love to discover new people to follow. 🙂
Bye for now!


This is a great post for anyone that uses Instagram. I don’t, I tried using it, but I realized that I don’t exactly take a lot of pictures and I couldn’t be bothered to take pics only to post them in IG lol
#Blogwarts
LikeLike
Thanks, Annie! You’re right, the workshop was based on Instagram, but I hope I’ve included enough general tips to be useful to anyone who uses their mobile for photography, whatever they use the photos for – that was my intention, anyway. 🙂 Have a lovely day! x
LikeLiked by 1 person
There are some interesting tips that those of us that don’t choose to own Iphones can use as well – I do wish instagrammers and teachers would focus on cameras rather than phone types though.
LikeLike